Tuesday, January 22, 2019

How to Pin Apps in Android 9.0 Pie 2019


It is always irritating when you hand over your phone to someone for a specific purpose and they end up going through other apps, messages, photos, and other personal data stored on it. Thankfully, you can get around this problem by using Screen Pinning. The feature first debuted with Android 5.0 Lollipop and is also present in Android 9.0 Pie, though just like before, it is buried deep inside the Settings menu.
What is Screen Pinning?

Before you hand over your phone to someone else, you pin the app the person wants to use. In this state, the person will have access to only that app and nothing else. Access to multitasking, home screen, app drawer or anything else is blocked. It’s like you pin that app on the screen and the user will only be able to access content from that app and nothing else.

Tip: A Look at Android Pie and What It Offers
How to Pin Apps in Android 9.0 Pie

Starting with Android 9.0 Pie, the way to pin apps has changed a bit. Instead of being available on lower-right, screen pinning is hidden in the app icon. But before that, if you have never used this feature, you will have to enable Screen Pinning first.

Turn on Screen Pinning in Android 9.0


Go to Settings > Security & Location. Scroll to the very end where you will find Screen Pinning.


Tap on it, and toggle it to turn on.


Also, make sure to turn the toggle on for the option “Ask for the PIN before unpinning.”


With Screen Pinning enabled, you can easily pin apps from the Recent Apps view on your Android device running Pie.

Pin Apps from Multitasking


Launch the app you want to pin.


Bring up the Recent Apps view and navigate to the app.


While in the multitasking view, tap on the app icon


Select Pin.


To un-pin, press and hold back and home button together. If you had selected the ask for pin option, the phone will be instantly locked. Since this is a common feature, people may know about it. If you don’t enable phone PIN or password in the option, he or she will have instant access to your phone.

In case you need: 3 Methods to Update Android Version

The name — Screen Pinning– is a bit misleading. While it makes sure that nobody can peek into anything else on your phone, it still gives one access to everything in the pinned app. It should have been named as app pinning instead of screen pinning. For example, if I pin the dialer app, one can still access recent calls, contacts and so on. The ideal situation would have been where one could be restricted to that screen only.


Do you use Screen Pinning? Do you find it useful? Let us know in the comments.

Sponsor ads:
Gihosoft Free iPhone Data Recovery:iphonerecovery.com
Free iPhone Data Recovery Software for Windows/Mac
Recover up to 12+ types of files, including contacts, SMS, photos, WhatsApp, Viber, notes, etc.
Restore lost data from iOS devices directly or from iTunes and iCloud backup
Recover iPhone data lost due to iOS upgrade/jailbreak, accidental deletion, device lost or broken
Support all the latest iPhone, iPad and iPod Touch
Both Free and Pro version.
If you lost data after you updated to a new iPhone, you can always use Gihosoft iPhone Data Recovery to get the data back from the old iPhone or backup.
Worth reading:download youtube 1080p
Jihosoft Android Data Recovery: the best Android Data Recovery software for Windows and Mac to recover deleted contacts, messages, photos, videos, WhatsApp and etc from Android

Like this post? Share it!

Monday, August 13, 2018

How to use iOS 12 Photos app?


How to use iOS 12 Photos app?

Searching is not intelligent, and you can easily find the photos you are looking for. If you are still confused about the new interface of the ‘Photos’ app then here is everything you need to know to ward off your doubts.

Speaking of photos, have a look at our list of best photo editing apps for iPhone.
For You: Sharing Suggestions

Photos app in iOS 12 has added a new section called ‘Sharing Suggestions’ under the For You tab. Added with the aim of making sharing photos a child’s play, Sharing Suggestions gives you suggestions to share photos with your friends. If you have a familiar face in photos, then the app would prompt you to share photos with them otherwise “Share with friends?” option would appear.

When you share photos with your friends from the Sharing Suggestions, your friends will also be prompted to share photos from the same event, time, date or location. This way, you can complete your album of the vacation without asking your friends for your photos repeatedly.

The photos will be shared in full resolution, so you don’t have to worry about losing the clarity if you are using Sharing Suggestions feature.
How to use Sharing Suggestions Feature of Photos?


Click on the albums displayed under sharing suggestions, and you will be taken to the photos.


Now select the photos you want to share and click on ‘Next.’


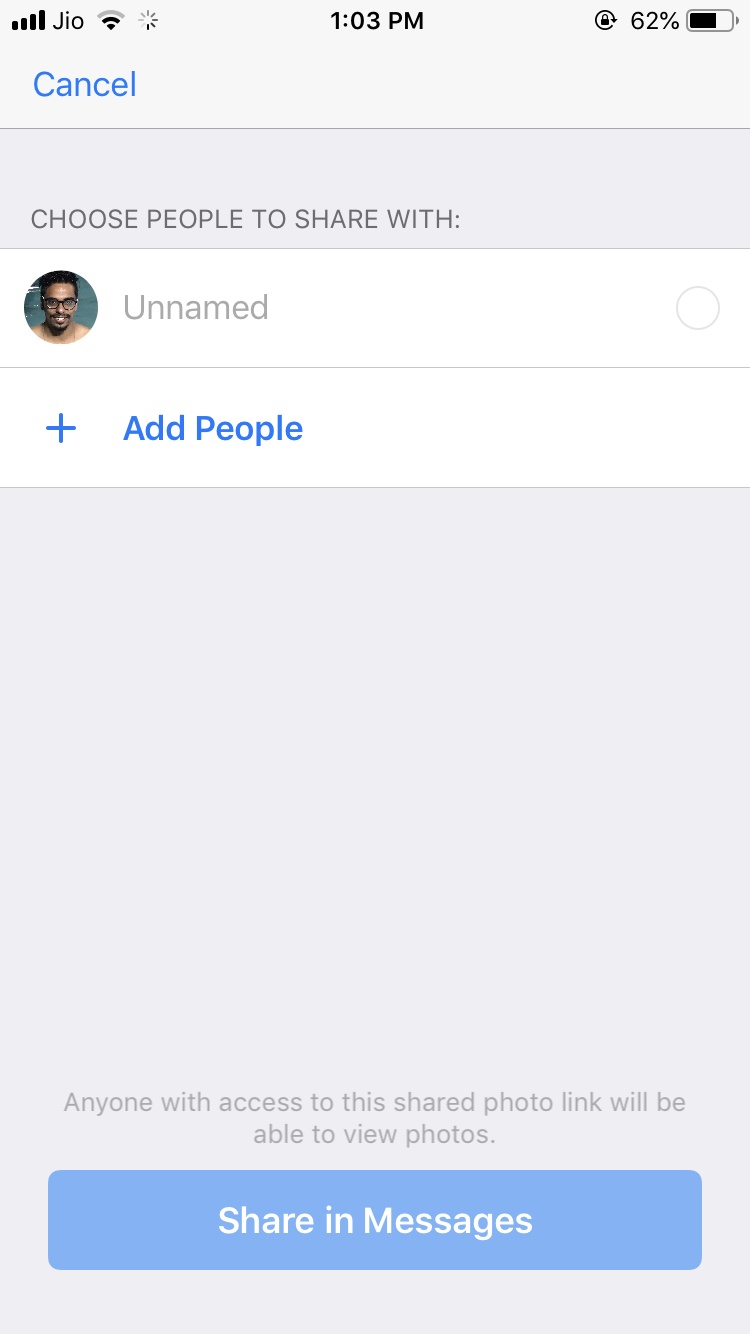
Add contacts with whom you want to share photos and click on ‘Share in Messages.’
For You: Memories

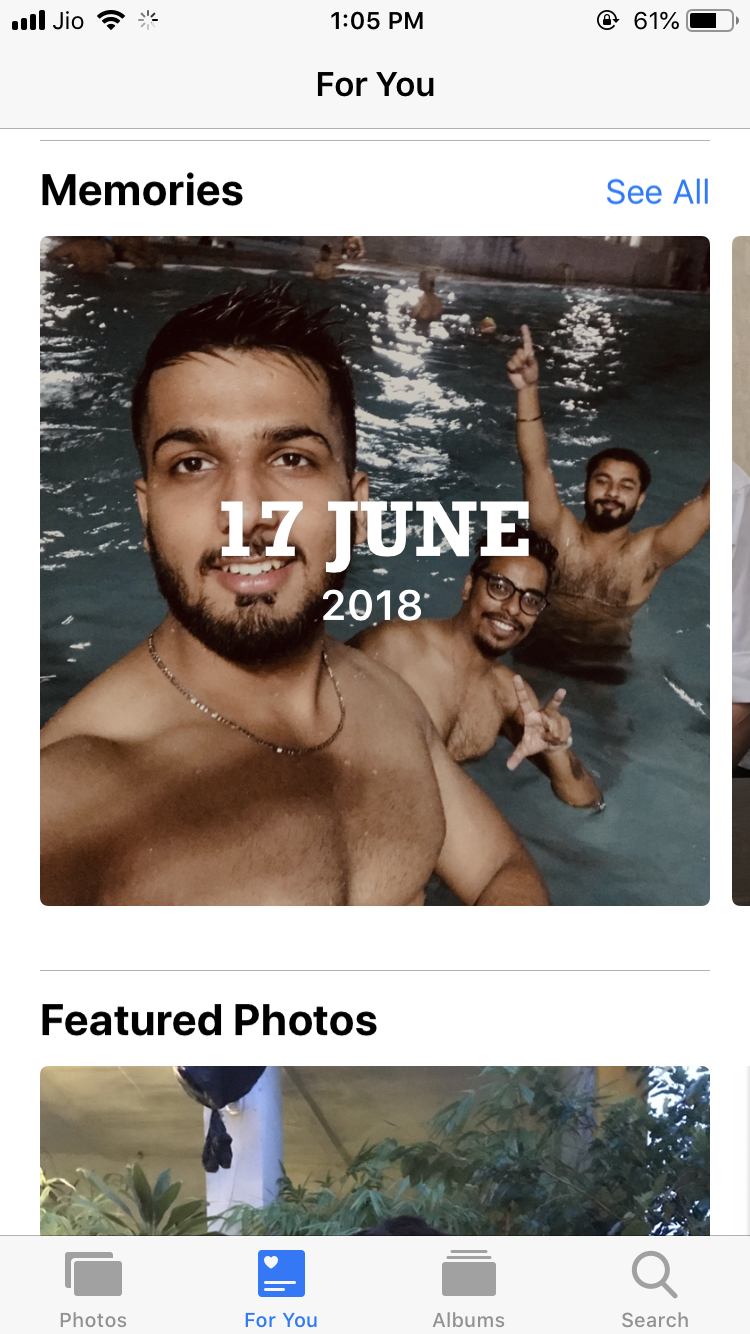
Below the Sharing Suggestions in iOS 12 Photos app, you will find Memories section. This section contains various photos and videos you have captured and turns them into a memory. Clicking on the memory leads you to the photos of that particular memory. You can also play memories with the play button. A collage of different photos with a background music will start playing on the screen.

You can scroll to the end of the screen to view ‘Related’ memories. Moreover, you also have the option of adding any memory to ‘Favorite Memories,’ or you can delete memories as well.

You may also like:

best youtube downloader

If you lost videos from iOS Camerall Roll which are nowhere to download again, you can use Gihosoft iPhone Data Recovery to get back deleted videos from iOS device including iPhone, iPad and iPod Touch.Please check jihosoft iphone data recovery

Monday, July 30, 2018

Top 5 Best Free Backup Tools For Mac

Top 5 Best Free Backup Tools For Mac
Best Free Backup Tools For Mac
1.Time Machine


Lets start the list with Time Machine, the macOS very own backup program. I have been using Time Machine since a couple of years and the feature has served me well. All you need to do is plug in a portable hard disk and configure the time machine to backup your data periodically. That being said Time Machine lacks advanced options and offers a very basic user interface. If you are a home user and are looking out for a basic backup tool the Time Machine should serve you well, else read on.
2.FreeFileSync


FreeFileSync fills in the void and offers all the advanced features that the time Machine misses out on. The file explorer interface can be used to sync contents accross two sources. The best part is that the FreeFileSync offers a good degree of control to the users when it comes to the specific files/folders that ought to be synced. With the two-way syncronisation you can make sure that both the folders are up to date and also handle the conflicts/duplication of files.


Download Freefilesync here
3.Super Duper


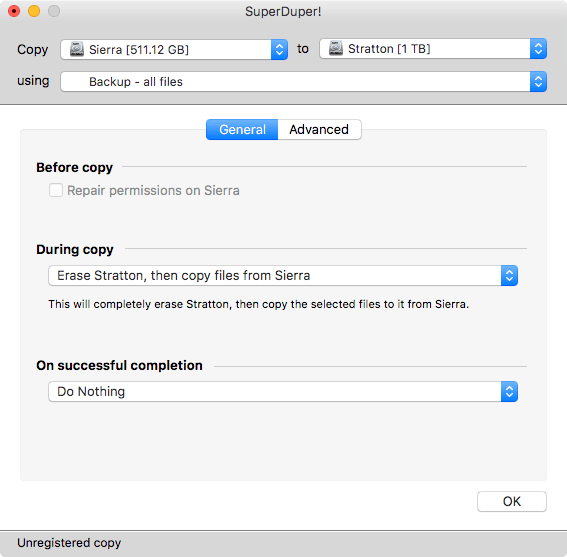
We have all heard of disk-cloning applications. Disk cloning is often referred to the process wherein your startup disk is backed up. In other words with this feature you can backup your entire operating system along with the user settings. The free tier of the Super Duper lets you backup and restore full disks but doesn’t allow users to schedule the process. If you want to have those advanced features you need to chip in and go for the premium tier.


Download SuperDuper here
4.CrashPlan


Untill now we have mostly talked about local file backup. However, it is also preferred to backup data on cloud drives. CrashPlan offers you free local cloud storage and allows yout backup Mac computers by creating your own local cloud. If you are wary of trusting cloud servers you can also backup your computer on off-site locations like your office servers. The free version of CrashPlan is pretty comprehensive and offers the ability to schedule backups, create off side backups and backup external drives.


Download CrashPlan here
5.iBackup


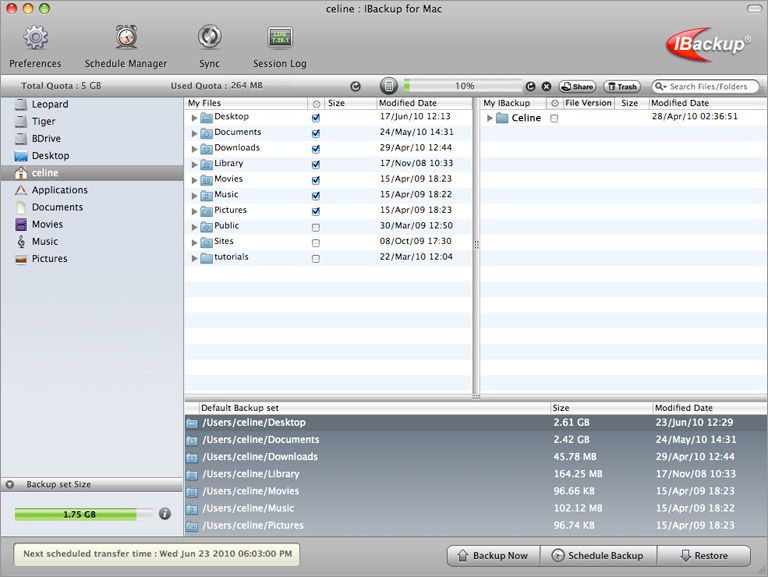
iBackup relies on a user interface that mostly resembles the macOS file explorer. The program allows you to select and backup single files/folders from your home directory. Additionally iBackup also allows you to backup system preferences and settings. Most importantly the iBackup is very efficient when it comes to backing up your Mac.


Download iBackup here
Conclusion


The world of free backup is less populated than it once was. However, two core applications, Time Machine and SuperDuper, can work together to create an excellent backup system that will protect you from many kinds of data loss. Just add a cloud backup service like Backblaze or Carbonite. Then you’ll have a robust backup system to keep your Mac’s files safe.


iPhone backup extractor :The best iPhone Backup Extractor software to extract photos, text messages, contacts, voice memos, note, WhatsApp, Viber and etc from iPhone/iPad backup


Gihosoft Free iPhone Data Recovery is a professional iPhone Data Recovery software to get back all your lost text message, photo, video, call history, note, contact and more from iPhone/iPad/iPod Touch. It offers a full solution to recover your lost data in different tough situations. Besides recovering data directly from iPhone, iPad and iPod touch, it also allows you to recover data from iCloud and iTunes backup files.

How to Block Any Website On Your Android Phone

How to Block Any Website On Your Android Phone

On Android, there are a couple of different things you can do. If you have a rooted phone, you can block websites by editing the hosts file on your device to redirect sites you want to block. You’ll need a file manager, and a text editor – the easiest option is to use our favourite app ES File Explorer, which lets you do both things. Here’s how it works.


Install ES File Explorer. Open ES File Explorer and tap the menu button at the top left. Tap on Local > Device > system > etc.


In this folder, you’ll see the file named hosts – tap it and in the pop up menu, tap text. In the next pop up, tap ES Note Editor.


Tap the edit button in the top bar.


Now, you’re editing the file, and to block sites, you want to redirect their DNS. To do this, just start a new line, and type “127.0.0.1 www.blockedwebsite.com” (without the quotes, where blocked website is the name of the site you’re blocking) for each website you want to block. For example, you’ll have to type 127.0.0.1 www.google.com to block Google.


Reboot your Android device.

If that method is too complex for you, you can install an anti-virus app such as Trend Micro that lets you block websites.

Don’t Miss : Best Xposed Modules you must try on Rooted Androd Phone 2018


Install the app and run it. Go to Options > Safe surfing.


Now swipe to Parental Controls and click set up account. Create an account and you’ll see an option called Blocked List in the app. Tap it, and tap Add. Now add the websites you want to block one at a time. Once that is done, you won’t be able to access these websites on your Android smartphone.


Bonus Tips:

Gihosoft Android data recovery Free is a super awesome software specialized in Android file recovery. With this program, you are able to recover deleted photos, music, videos, messages, contacts, call logs, WhatsApp messages, Viber chat history and more from Samsung, Huawei, LG, HTC, Motorola, Google, Oneplus, Sony, Lenovo, ZTE and other Android devices directly. Meanwhile, this Android data recovery software is available for both Windows and Mac platforms.

How to Block Any Website On Browser Level

Blocking a website on any browser is the easiest way to get the job done.

On Firefox, you can install an addon called BlockSite to block website.


Install the addon, press ctrl+shift+a, and click Extensions on the left. Now click Options under BlockSite. In the pop-up, click Add and type the name of the website you want blocked. Repeat the process for all websites you don’t want to access. Click OK.


Now these websites will be blocked on Firefox. You can also set a password in BlockSite to prevent others from editing the list of blocked websites. This can be done via the options menu described in the previous step.

BlockSite is also available on Google Chrome.

Internet Explorer lets you block websites easily. Here’s how.


Open the browser and go to Tools (alt+x) > Internet Options. Now click the security tab and then click the red Restricted sites icon. Click the Sites button below the icon.


Now in the pop-up, manually type the websites you want to block one-by-one. Click Add after typing the name of each site. When done, click Close and click OK in all other windows. Now these websites will be blocked in Internet Explorer.

How to AirDrop Files from iPhone to iPhone?

1. How to AirDrop Files from iPhone to iPhone?

Follow these simple steps below and get started.


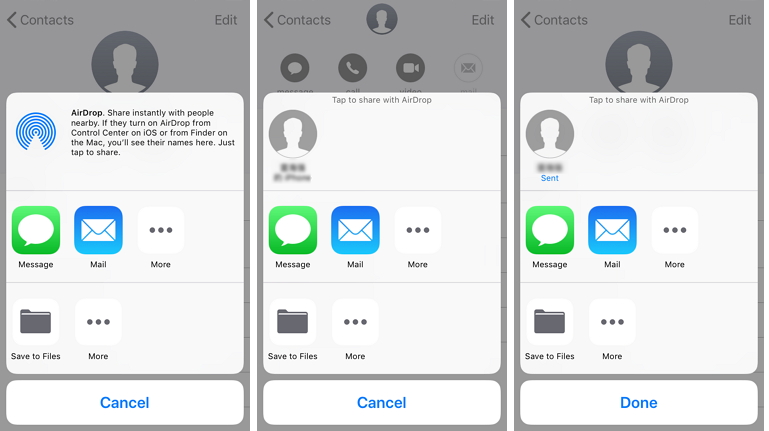
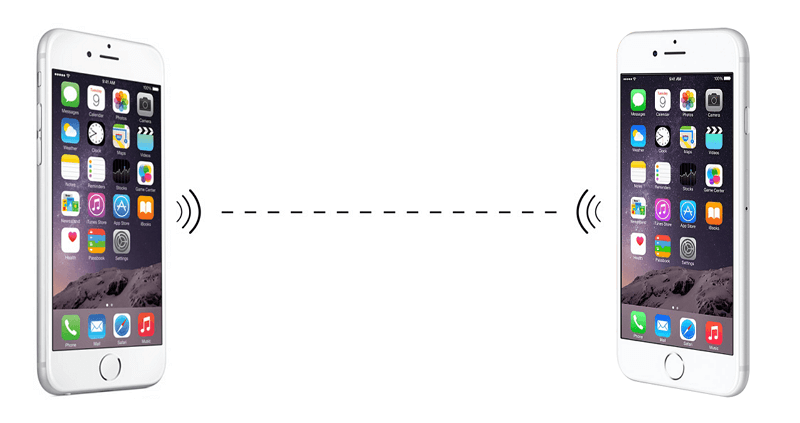
Step 1: Switch on Wi-Fi and Bluetooth on both iPhone devices. There is no need to connect to a network.


Step 2: Swipe up from the bottom of your iPhone screen to open the 'Control Center'.


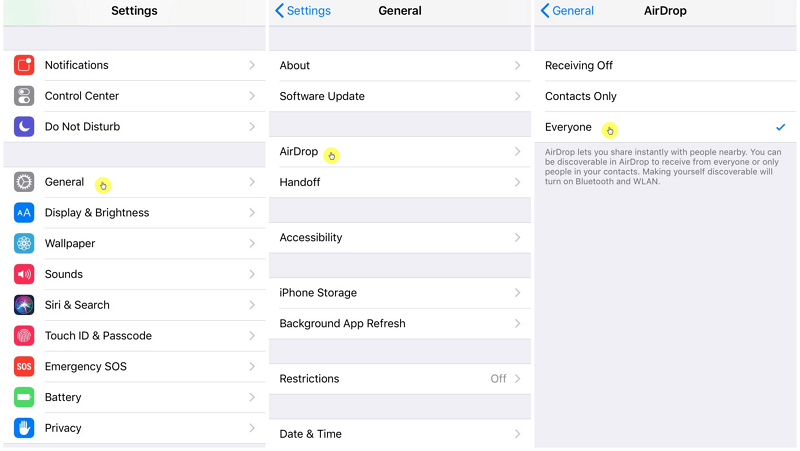
Step 3: Click on 'AirDrop.' Then you can choose either 'Contacts Only' or 'Everyone' to send or receive data from you.


Step 4: Choose the file(s) you wish to transfer. For instance, go to the Contacts App and select the contact that you want to share on another iPhone device.


Step 5: Tap on the Share button and select the iPhone with which you are sharing your files. It should be visible on your screen.


Step 6: From the receiver's iPhone, they choose 'Accept' to access the files sent from your device.


2. Problem Locating Another iPhone When You AirDrop?

There will be instances where you are not able to share files because you cannot see the other person's iPhone while using AirDrop.

Don't panic; these concerns may be solved with some simple troubleshooting.


Maybe it is just distance that is the problem. If you are not near enough to your sender or receiver, you may not be able to transfer files successfully. Bluetooth and Wi-Fi can only reach a specific range, so if you're far away, you will lose your connection.


Check if the person you're sharing with has AirDrop receiving settings that are set to 'Contacts Only'. If you are in their Contacts list, you must provide your Apple ID information in your contact card before continuing with the process. Otherwise, have them set their AirDrop receiving setting to 'Everyone' to bypass this problem.iPhone backup extractor free:The best iPhone Backup Extractor software to extract photos, text messages, contacts, voice memos, note, WhatsApp, Viber and etc from iPhone/iPad backup.


3. What Can You AirDrop from iPhone to iPhone?

With AirDrop, there is an extensive list of files you can send to your family, friends, and acquaintances.

Most users usually send photos and videos, but the list is not limited to those. As long as you both have an iPhone, then feel free to share almost everything under the sun. Files include the following:


Photos


Videos


Contacts


Passbook passes


Notes


Documents and PDFs


Mail attachments


Items stored in Files app


Voice Memos


Web URLs


Links to App pages (App Store)


Maps directions

AirDrop does have its restrictions – it doesn't support messages and popular 3rd-party social apps such as iMessage or WhatsApp from iPhone to iPhone.

There are two solutions.

If the sender's privacy is not of high concern and you want to share all the content, then you can forward your message and send it directly to your recipient via text or any third-party direct messaging app.

Using AirDrop, you can create a file from 'Notes' or 'Documents,' then type the message out there and share it immediately.

Not ideal is it? However, there is a much more straightforward and user-friendly way to achieve this through a third party app.

Tuesday, July 24, 2018

iPhone Brute Force Hack: Here’s How To Hack Any iPhone Model


iPhone Brute Force Hack: Here’s How To Hack Any iPhone Model

The security of the iPhone is compromised after discovering a new method by brute force by which if an attacker steals your device then the attacker can easily unlock your iPhone with infinite password attempts.

The tech giant Apple’s iPhone unlock code is the main workhorse that attackers have to face if they want to unlock any victim’s device, but in the last few hours, a new brute-force method has been discovered whereby the security system of iPhone is unable to count the number of failed attempts.

Matthew Hickey, security researcher and the co-founder of Hacker House, has shown a new method that allows access to the iPhone even when it is locked through the use of infinite password attempts. This method allows to skip the security of the iPhone on devices with iOS 11.4 or lower.

Thanks to the Secure Enclave system of the iPhone, the device is able to identify unsuccessful access attempts to block it or even to erase all of its information. However, it seems that the Secure Enclave of iPhone has a security hole that allows an attacker to make infinite attempts to unlock as long as the device has iOS 11.4 or below and with a Lightning cable.

Apparently, there is a way by which if all the passwords are sent to unlock the phone at the same time, the iPhone’s security system detects it only as a single attempt. In this way, the attacker could send a single access request but full of billions of passwords to try to unlock any type of device.

Obviously, it is not a simple process and requires an experienced attacker with adequate access programs, and according to the password of each user, the process can last up to thousands of hours.Sponsor Ads:

Gihosoft Free iPhone Data Recovery is a professional iPhone Data Recovery software to get back all your lost text message, photo, video, call history, note, contact and more from iPhone/iPad/iPod Touch. It offers a full solution to recover your lost data in different tough situations. Besides recovering data directly from iPhone, iPad and iPod touch, it also allows you to recover data from iCloud and iTunes backup files.

It is likely that this failure of iPhone security has been resolved in the coming weeks by the tech giant Apple itself, and it will be no longer possible to use with the next iOS 12.

Wednesday, July 18, 2018

What to Do before You Sell or Give Away Your Old iPhone


What to Do before You Sell or Give Away Your Old iPhone

There are somethings you should do before selling your old iPhone; basic things that will make sure you are only selling your iPhone and not a database where people can source for your personal information.


Back up with iTunes or iCloud: If there are some files that is important and useful for you, make sure to do a full back up, that way all your data can be restored whenever you want.


Sign Out from iTunes and App Store : iTunes and App Store keep all your personal data like name, address and most importantly payment information. You don’t want the next owner know any about it and use if for bad purpose. If you don’t have any professional tool help you reset your old iPhone, you should sign out manually to protect your personal privacy.


Reset Personal Data Completely: It’s important to reset your old iPhone completely to make sure your personal data keep safe and no access to wrong hands. Rather than normal reset from settings directly with chance of recovery, it’s better and safer to reset it using a professional tool to ensure everything is gone forever.

If you ever lost or accidentally deleted data from your iOS device, you can use the professional Gihosoft iPhone Data Recovery software to retrieve important data from iPhone, iPad or iPod Touch even without backup.

Jihosoft iPhone Backup Extractor Extract and recover all types of data from iPhone backup files, such as camera roll photos, videos, SMS, contacts, reminders, WhatsApp, and etc.

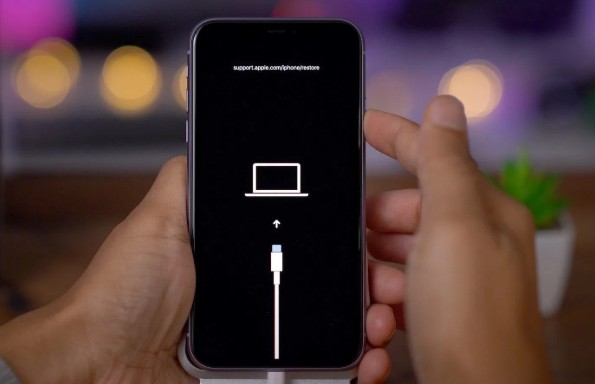
How to Place iPhone 11/11 Pro/11 Pro Max in Recovery Mode with iTunes?

How to Place iPhone 11/11 Pro/11 Pro Max in Recovery Mode with iTunes? Also, you can put your device into Recovery mode with iTunes, but ...